
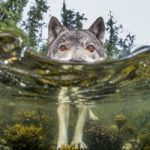
Light is King: Golden hour (sunrise and sunset) delivers the most magical light, casting long shadows and rich colours. Avoid harsh midday sun; it creates unflattering shadows and washes out colours. Learn to use backlighting creatively; it can produce stunning silhouettes or ethereal glows. Understand how your camera interprets light differently than your eye; learn to adjust exposure accordingly.
Composition is Crucial:
- Keep it simple: Minimize distractions in your background and focus on a clear subject.
- Fill the frame: Get closer to your subject for impactful shots. Avoid unnecessary empty space.
- Experiment with perspective: Shoot from high vantage points for dramatic landscapes or get down low for unique angles and a sense of scale.
- Beware the background: Check for distracting elements behind your subject. A cluttered background detracts from the main focus.
Gear and Practical Tips for Active Travelers:
- Lightweight gear: A mirrorless camera is often preferred over a bulky DSLR for backpacking or hiking. Consider a versatile zoom lens to minimize weight.
- Protect your equipment: Use a waterproof backpack and consider a rain cover for your camera.
- Extra batteries and memory cards: Essential for long days of shooting, especially in remote areas.
- Clean your lens: A microfiber cloth is your best friend for keeping lenses smudge-free.
- Learn basic editing: Simple adjustments like cropping, brightening, and sharpening can make a big difference in post-processing. Many apps are available for smartphones.
Beyond the Basics:
- Capture the Journey: Document the journey, not just the destination. Include photos of the trail, the people you meet, and the details of your adventure.
- Tell a Story: Think about the narrative you want to convey. Sequence your photos to tell a compelling story of your travels.
- Embrace Imperfection: Don’t strive for perfection. Sometimes, spontaneous, slightly imperfect shots capture the essence of a moment better than perfectly posed images.
What is the best pose for a passport photo?
The best passport photo pose prioritizes a neutral, yet approachable expression. Push your head slightly forward to define your jawline and avoid a double chin. Avoid forcing a wide-eyed stare; instead, gently lift your lower eyelids to create a more natural and alert look. Good posture is key; a deep breath before the photo will naturally straighten your spine. A slight, natural smile is preferable to a forced grin; aim for a subtle, friendly expression. Avoid harsh lighting; overcast days or soft, diffused light are ideal. Taking the photo after a light workout can give you a healthy glow. Subtle makeup can even out your complexion but avoid anything too dramatic. Finally, always use a mirror to check your hair and ensure your overall appearance is neat and tidy. Remember, passport photo regulations vary by country; check specific guidelines beforehand. For example, some countries prohibit head coverings, while others have strict rules about glasses. Also, ensure the background is plain and uncluttered, meeting the required specifications of the issuing authority. A slightly tilted head can sometimes be more flattering than a perfectly straight-on shot, but don’t overdo it. Lastly, consider several takes to guarantee at least one perfect photo that meets all regulations.
How do you take pictures when traveling alone?
When capturing moments while exploring solo, a few techniques become indispensable. First, having a reliable tripod is fundamental. It provides stability for sharp images, especially in challenging light, and allows you to frame your shot deliberately, deciding exactly where you want to be within the scene.
The timer function isn’t just for convenience; it allows you to transition from photographer to subject, giving you a few crucial seconds to settle into the frame and embody the feeling of the place. For more dynamic control or discreet captures, a remote shutter release is invaluable. It offers freedom to move slightly or integrate yourself more naturally without the rush against the timer.
Burst mode is excellent for capturing movement or finding that single perfect expression or interaction with the environment. It increases your chances of getting a less staged, more authentic shot when you are the subject.
Beyond the gear, always pay attention to the light. The soft glow of the golden hour shortly after sunrise or before sunset is your greatest asset for warm, evocative self-portraits that convey mood and depth.
Scout your location beforehand. Spend time walking around, finding the best angles, considering how you can use the landscape to frame yourself, add scale, or tell a part of the story. Think about the composition – how do you fit into this vast or intimate space?
Patience is also key. Sometimes the perfect moment requires waiting for the right light, for people to move out of frame, or simply for you to feel truly present in the scene before pressing the shutter. The goal is not just a photo *of* a place, but a photo that captures your experience within it.
How to carry a camera while traveling?
Pack Light & Smart: For any active trip, whether it’s hiking, climbing, or trekking, weight is paramount. Ruthlessly evaluate your gear. Do you *really* need that third lens? Focus on versatile lenses (a good zoom) and multi-use accessories. Every ounce saved means less fatigue on the trail.
Integrate, Don’t Separate: Forget dedicated, bulky camera backpacks. They scream “expensive gear inside!” and aren’t built for serious comfort or utility on a long trek. Instead, use your regular hiking backpack and integrate your camera gear securely within it using padded inserts or modular camera cubes. This offers better weight distribution, blends in, and protects against the elements inside a pack designed for outdoor conditions.
Protection is Non-Negotiable:
- Weather & Dust: Your backpack is your first line of defense. Keep your camera gear inside when not actively shooting, especially in rain, snow, wind, or dusty environments. Use dry bags (even simple ziplocs) inside your padded cube for extra moisture and dust protection.
- Shock: Utilize padded inserts and pack clothes strategically around your camera cube inside the main compartment for cushioning against bumps and drops.
Quick Access on the Move: Waiting to take photos often means missing the shot. You need a system that allows quick access without stopping and unpacking:
- Camera Clip System: Mount a sturdy camera clip (like those that attach to backpack straps or belts) to keep your camera body+lens securely outside your pack but immediately available.
- Top-Loading Access: Position your camera cube or gear near the top of your backpack’s main compartment or in a dedicated top lid pocket if your pack has one.
- Front/Chest Pouch: For a smaller setup or quick-grab lens, a securely attached chest pouch on your backpack harness can work.
Secure Your Camera When Out: A camera out of the bag should always be secured to you. A standard neck strap can bounce and be uncomfortable during activity. Consider:
- A secure sling strap that can be worn across your body.
- A sturdy wrist strap, especially if using a camera clip system.
- Ensuring straps are wide enough to distribute weight if worn for extended periods.
Low Profile Security: Deterring opportunistic theft is important. Tape over prominent logos on your camera body, lens hoods, and even battery chargers with black gaffer tape. It makes your gear less identifiable and looks less expensive.
Essential Trail Accessories: Don’t overlook these for an active trip:
- Extra Batteries: Cold weather significantly drains batteries. Keep spares in a warm inside pocket.
- Adequate Storage: Pack enough memory cards or have a rugged, portable backup solution.
- Cleaning Kit: A simple lens cloth and small blower brush are crucial for dealing with dust, dirt, and moisture on lenses and sensors in the field.
How should I pose for a travel photo?
Here are some dynamic poses to capture the spirit of your active travel adventures:
Embrace the Action: Don’t just stand there – capture the energy! Show yourself mid-hike, scrambling up a rock face, powering through water, or the dynamic movement of your activity.
Your Gear Tells a Story: Integrate your equipment. Show yourself adjusting your backpack, leaning on trekking poles, holding your kayak paddle, or checking your climbing harness. It adds authenticity to the adventure.
Victory Pose!: Arms in the air, hands on knees recovering, or a triumphant stance – capture the feeling of accomplishment at a summit, a finish line, or after a challenging section.
Interact with the Environment: Go beyond just posing in front of a view. Touch the ancient stone, test the temperature of the water, sit on a cliff edge (safely!), or lean into the wind. Show your connection to the place.
Focus on the Destination (Looking Away): A shot from behind looking out over the vast landscape highlights the scale of your adventure and the reward of reaching that point after the effort.
Show the Effort: Capture moments of exertion – hands on knees after a steep climb, pushing off with poles, or concentrating on a tricky path. It shows the reality of active travel.
Mid-Journey Moment: Capture a pause or transition – sitting on a fallen log during a break, checking a map, or hydrating while enjoying a brief stop with a great view.
The Path Ahead (Moving Away): Show yourself heading deeper into the wilderness or towards the next leg of your journey. It creates a sense of ongoing exploration and adventure.
Details of the Journey: Don’t forget close-ups: muddy boots after a long trek, worn hands gripping gear, sweat dripping, or a focus on map and compass use. These small details add depth.
Share the Experience: If you’re with others, capture the camaraderie – helping a friend, high-fiving after a challenge, or a group photo celebrating a shared achievement.
What are the don’ts of travel photography?
Not enough research done ahead of time: For active tourism, this isn’t just about finding pretty spots; it’s about understanding the terrain, weather variability, and the specific challenges or opportunities the route presents for photography. Researching potential compositions or prime photo moments *along* your planned hike, climb, or paddle route means you won’t miss unique angles or transient light.
Trying to do too much: Don’t let photography detract from the primary activity. Balance your desire for great shots with the demands of the trail or adventure. Packing too much gear or constantly stopping can ruin the flow and safety of an active trip. Prioritize accessible, multi-purpose equipment.
You’re too far away: Active tourism is about immersion. Get close to the action – capture the sweat, the effort, the details of the gear, the interaction with the environment. For landscapes, get closer to foreground elements like rocks, plants, or water to add depth and a sense of presence in the scene you’re moving through.
Taking tourist shots: You’re off the beaten path! Skip the generic postcard views from accessible overlooks. Focus on capturing the unique perspective gained from the journey itself – the view from a narrow trail, the atmosphere inside a forest, the reflections from your kayak, the details of the environment you are actively experiencing.
Settling for the first photo: Move your feet, change your angle, experiment with perspective (high, low, wide, tight). In active settings, this also means waiting for the dynamic moment – the splash of water, the expression during a climb, the perfect framing of a subject within the landscape provided by the path.
Not being ready: Conditions change fast on the go. Have your camera easily accessible, protected from elements (rain, dust, impact), and ideally with settings pre-adjusted for the expected light and movement. Anticipate photo opportunities ahead on the trail or river so you can react quickly without holding up your group or missing the moment.
Missing the best light: Active pursuits often put you in incredible locations during golden hour, sunrise, or sunset – times when light is most dramatic. Plan your route or activity timing to coincide with these periods whenever feasible. The soft, warm light and long shadows can transform landscapes and make action shots pop.
Can I take a passport photo on my phone?
Yes, absolutely. As an experienced traveler, taking your passport photo yourself on your phone is a surprisingly viable option these days, often saving you time and money compared to professional studios. Many modern smartphones have cameras perfectly capable of capturing the detail required for a compliant photo, especially those released in the last few years.
Here’s the essential breakdown and some practical tips I’ve learned:
Background: This is critical. You need a plain, white background. No patterns, no off-white walls, no shadows behind you. Find a blank white wall. If you don’t have one, hang a white sheet or even use a large white piece of cardboard or foam board behind you. Make sure it’s smooth and evenly lit.
Lighting: Natural light is your best friend. Stand facing a window during the day, but avoid direct sunlight which can cause harsh shadows or squinting. Even, diffused light is ideal. Avoid overhead lights which can cast shadows under your eyes or chin. The goal is a clear, well-lit face with no harsh shadows or glare.
Framing and Pose: Your entire face must be visible, with a neutral expression (or a natural, slight smile depending on the country’s rules – but neutral is safest universally). Your head should be centered and occupy a significant portion of the frame, typically 50-70% of the photo height from the bottom of your chin to the top of your head. Look directly at the camera.
Stability: Avoid blurry photos. Selfies where you’re holding the phone close to your face are difficult to get right regarding framing, angle, and stability. It’s much better to use a tripod, lean the phone against a stable surface, or have someone else take the picture for you. Use your phone’s timer function if you’re doing it yourself without a tripod.
Camera Settings: Use the highest resolution setting available on your phone. This ensures the photo is crisp and detailed, which is important for both digital submission (if applicable) and printing.
No Edits or Filters: This is non-negotiable. Do not use any filters, heavy retouching, or significant edits. The photo must represent your natural appearance without alteration. Minor cropping and necessary adjustments for size/format using a compliant tool are fine, but avoid anything that changes your face, skin tone, or the background colour.
Using Apps: There are specialized passport photo apps available (like the one mentioned, PhotoAiD, or others). These apps are incredibly helpful as they often have guides to help with framing, check for compliance issues like shadows or background problems, and can format the photo to the correct dimensions for various countries. They can take a lot of the guesswork out of the process.
Printing: Once you have the digital file, you still need a physical copy for most applications. You can get these printed at many pharmacies, photo shops, or online print services. Crucially, ensure they print it at the exact required size (usually 2×2 inches for US passports, but check your country’s specific requirements!). Sometimes you’ll get a sheet with multiple copies – great for backups!
Final Check: Before submitting, always double-check the official requirements for the specific passport or visa you are applying for. Requirements can vary slightly between countries regarding background colour, expression, head size percentage, and photo age. A quick look at the official government website can save you the hassle of rejection.
Taking the photo yourself with your phone is totally doable and convenient if you pay attention to these details. Good luck!
How to take pictures by yourself with an iPhone?
So, you’re out there, exploring, hiking, climbing, or biking, and you want to grab a shot of yourself soaking it all in. Easiest way? Flip open that Camera app on your iPhone, tap the icon to switch to the front-facing camera – that’s your adventure diary lens right there. Frame up the shot, making sure to get some of that epic backdrop you worked so hard to reach, and hit the big white circle shutter button or just press a volume button. Quick and dirty, perfect for a fast snap on the go.
But let’s get real, holding your phone steady after a tough climb or while balancing isn’t always ideal. That’s where the hands-free magic comes in. The self-timer is your best friend for solo shots – set it to 3 or 10 seconds, hit the shutter, prop your phone up (on a rock, a log, your pack), and get yourself into the frame. Volume buttons work too if you can manage to brace the phone against something.
For truly stable and well-composed shots, especially if you want more than just a headshot (like getting your full body conquering that viewpoint!), investing in a compact, adventure-friendly tripod or mount is key. Think small, foldable tripods, or even a flexible gorilla pod that can wrap around a tree branch or railing. Combine that with a small Bluetooth remote shutter, and you can be 50 feet away, perfectly positioned, and trigger the shot without touching the phone. It makes a massive difference for scenic self-portraits.
Selfie sticks have their place too – great for getting a quick elevated view or navigating tricky angles, but for stability and dynamic shots, a tripod is usually better on the trail.
Don’t forget voice control! “Hey Siri, take a photo” is incredibly useful when your hands are full or you’re trying to keep the phone perfectly still. Just make sure Siri is listening. Also, experiment with placing your phone on stable surfaces – a rock, a backpack on the ground, a sturdy fence post. Get creative with your environment to prop it up.
And a final tip for outdoor shots: composition is king. Use leading lines from the trail or rock formations to draw the eye, frame yourself small against a massive landscape to show scale, and use natural light to your advantage. Golden hour light is magical for photos.
Do I have to take my camera out of my bag at TSA?
Yes, you absolutely must take your camera out of your bag for TSA screening.
Treat it like any larger electronic device, similar to a laptop. Security needs a clear, unobstructed view of it on the X-ray machine, which is why dense electronics need to be examined separately.
Place your camera body – especially DSLR or mirrorless models – into a separate tray for scanning. It’s a good idea to keep it in its protective soft case even in the tray to prevent any bumps or scratches during handling.
For efficiency, pack your camera somewhere easily accessible in your carry-on, ideally near the top. While the camera body itself needs to come out, smaller lenses or accessories can often remain packed within your bag.
Following this procedure is standard and helps ensure the security process goes as smoothly and quickly as possible for everyone.
How do I take the most flattering passport photos?
Start Fresh and Rested: As a seasoned traveler, I can tell you looking good for a passport photo isn’t about hitting the gym beforehand (unless that makes you glow). It’s about being well-rested and hydrated. Aim to take the picture when you’re not feeling rushed or tired. You want to look alert and calm, ready to face any border agent, not like you just survived a long-haul flight.
Subtle, Strategic Makeup: Yes, use makeup, but think “undercover agent” not “red carpet.” Focus on minimizing dark circles (a travel essential!), evening out skin tone, and making your eyes look bright. Keep it natural. Heavy foundation or dramatic looks aren’t necessary and could even cause issues if they significantly alter your appearance.
Check Your Appearance: Always take a moment with a mirror just before. Ensure your hair is neat and completely out of your face. Remember, rules often require your forehead and ears to be visible. Your clothing matters too: choose a solid color, definitely not white (it blends into the background). A simple top with a neat collar usually looks best and adds a touch of professionalism without being distracting.
Harness Natural Light: This is key. Find soft, natural light, like facing a window on a slightly overcast day. Avoid harsh overhead lights or direct sun, which create unflattering shadows that age you or hide your features. Good, even lighting makes your skin look better and ensures your face is clearly visible, which is the main point.
Practice Your Expression and Shoot Many: You can’t smile widely, but you don’t have to look glum. Practice a relaxed, neutral expression with your eyes clearly open and looking directly at the camera. Find your best angle. Then, take *lots* of photos. Don’t just take one or two. The more options you have, the better your chances of finding one where the light is perfect, your expression is good, and everything looks just right.
Adhere Strictly to Rules: This is non-negotiable. NO HATS, NO HEADPHONES, and NO GLASSES are standard requirements unless you have specific, documented medical reasons (and even then, check the exact rules, often it’s easier without). Nothing should obscure your face, head, or the outline of your head. These rules are strictly enforced, and getting it wrong means delays and retakes.
Which camera is best for solo travel?
Choosing the perfect camera for solo travel is less about finding a single “best” and more about identifying the right tool that fits your style, your budget, and how you plan to capture your journey. As someone who’s navigated countless cities and trails alone, I know the camera becomes a silent companion, and its usability when you’re both photographer and subject (or just trying to be discreet) is paramount. Here’s a breakdown based on common solo travel needs:
For the Adventurous & Active Traveler: GoPro Hero 11 (or later)
If your solo trips involve anything that might get wet, dusty, or high-impact – hiking, cycling, surfing, or simply wandering through bustling, unpredictable environments – an action camera is invaluable. The GoPro Hero 11 (and its successors) is practically bombproof, offers incredibly stable footage even when you’re moving, and its wide-angle lens is fantastic for capturing expansive landscapes or immersive point-of-view shots. It’s small enough to mount almost anywhere, leaving your hands free, which is a massive plus when you’re managing luggage, maps, or just trying to stay balanced.
For High-Quality Stills and Versatile Shooting: Sony A7 III or A7 IV (Mirrorless)
If photography is a major focus of your solo travel, and you demand excellent image quality, dynamic range, and low-light performance, a full-frame mirrorless like the Sony A7 series is tough to beat. The A7 III is a legendary workhorse that’s now more affordable, while the A7 IV brings improved autofocus, higher resolution, and better video features. Yes, they require interchangeable lenses (adding weight and cost), but the flexibility to shoot wide landscapes, detailed portraits, or telephoto wildlife makes them incredibly versatile. It’s a significant investment in both money and carrying capacity, so consider if you’re willing to manage the extra gear alone.
For Discrete Vlogging and Pocketability: Sony RX100 VII (Compact)
This tiny powerhouse is a long-time favorite for travelers who want exceptional quality without the bulk. The RX100 VII packs a surprisingly good zoom lens and robust video features (including a microphone jack and flip-up screen useful for solo vlogging) into a body that slips into a jacket pocket. It’s perfect for street photography where you don’t want to look like a tourist with a large camera, or for easily capturing spontaneous moments without fuss. The trade-off is the price, which is high for a compact, but you’re paying for convenience and performance in a minuscule package.
For Getting Started on a Budget: Canon 2000D (or similar Entry-Level DSLR/Mirrorless)
My very first DSLR was a Canon similar to the 2000D, and it taught me so much. An entry-level DSLR or mirrorless camera in this price range is a great way to step up from a smartphone without breaking the bank. They offer better image quality than most phones (especially in challenging light), the ability to change lenses (even starting with a versatile kit lens), and manual controls to learn photography basics. Be aware they can be bulkier than modern mirrorless options, and video features might be basic, but for learning and capturing solid photos, they’re a good entry point. Look for used options or slightly older mirrorless models in this budget range too.
For Everyday Convenience and Social Sharing: iPhone 13 Pro (or any modern flagship Smartphone)
Let’s be honest, the best camera is often the one you have with you. For many solo travelers, a modern smartphone like the iPhone 13 Pro (or any recent flagship Android) is more than sufficient. Computational photography means they excel in good light, portrait modes are great for solo shots, and their video capabilities are constantly improving. The biggest advantage is seamless integration with editing apps and social media for instant sharing. While they struggle more in low light compared to larger sensors and lack optical zoom versatility (beyond what’s built-in), for capturing memories, navigating, communicating, and everything else, the smartphone is the undisputed king of convenience for solo travel.
How do you shoot pictures alone?
For capturing your solo travels, your phone is the simplest and most accessible tool. It’s always handy and modern cameras are excellent.
You absolutely need a reliable, preferably compact, phone tripod and a tiny Bluetooth remote. Often you can buy these together in a convenient bundle. The tripod lets you set up the shot in interesting locations and perspectives you couldn’t otherwise achieve.
The key to getting natural-looking self-portraits when traveling alone is using a timer app with an interval shooting function. Instead of setting a 10-second timer for one photo, you tell the app to shoot every 3, 5, or 10 seconds for a set duration (like 60-90 seconds).
This technique allows you to move around, shift your pose, look at the scenery, or interact with the environment naturally while the camera continuously captures frames. You’ll get dozens of shots, giving you a much higher chance of finding genuinely candid and dynamic images among the batch.
Scout your location and think about composition. Use the environment – frames, leading lines, interesting backgrounds – don’t just stand centered. Practice getting into position and acting naturally before the timer starts.
How to take good travel pictures on iPhone?
Hunt for those standout colors. Every place has its own palette – the rich spices in a market, the vibrant textiles, the specific hues of local architecture or nature. Don’t just see them, isolate them, make them pop in your frame.
Use lines to tell the story. Roads disappearing into the distance, the rigid structure of buildings, winding paths – these aren’t just paths, they’re visual guides pulling the viewer into your image. Look for symmetry or strong diagonals that lead the eye.
Have a mental shot list of must-sees or experiences you hope to capture, but stay loose. The truly memorable photos are often the unexpected moments or quirky details you stumble upon when you’re just exploring.
Embrace atmospheric conditions like fog or mist. They soften the scene, create mystery, and can turn an ordinary landscape into something ethereal. Focus on the mood it creates rather than complaining about poor visibility.
Don’t fear a little blur. It can effectively show movement in a bustling street scene, isolate a subject using the depth effect on newer iPhones, or add an intentional artistic touch. It captures the *energy*.
Focus on the small stuff. Beyond the grand vistas, capture the textures of worn stone, intricate carvings on a doorway, the details of a local craft, the character in someone’s hands working. These specifics build a richer, more personal narrative.
Avoid the classic postcard view crammed with people. Get up early to catch the soft morning light before the crowds descend, stay out late, or find a slightly different angle that captures the essence without the tourist swarm.
Play with light and shadow. Harsh sunlight can be tricky, but strong shadows add depth, drama, and reveal textures you wouldn’t otherwise see. Look for interesting patterns they create on buildings or in landscapes.
What is the best color to wear for passport photos?
Alright, seasoned traveler tip for the passport photo: the background is universally white or light gray. To make your face stand out clearly – which is the whole point – you need contrast.
Go for solid, darker colors like navy blue, black, charcoal gray, or deep brown. This helps the camera focus on your features and makes your photo easier for officials to scan and verify quickly.
Definitely avoid patterns, logos, stripes, or anything too busy or distracting. Plain solid colors are often required and simply look much cleaner. Also, steer clear of overly shiny fabrics that might cause glare on the photo.
While bright colors *can* sometimes be acceptable, they must not be distracting or blend into the background. Sticking to dark, solid neutrals is the easiest way to ensure your photo is accepted the first time and looks professional for the next decade you’ll be using it.
What are the do’s and don’ts of Travelling?
Before you even pack, dive deep into your destination. Research isn’t just looking at pictures; understand the local pulse, common scams to avoid, public transport secrets, and respectful customs. Book your essential flights and first few nights, but resist the urge to schedule every minute – the magic often happens in the unplanned moments.
Learn the mantra: pack light. It’s the single biggest improvement you can make to your travel flow. Excess baggage isn’t just a fee; it’s friction. Aim for carry-on if possible. Choose versatile, quick-drying clothes. You can always wash things, and buying a forgotten item locally is often part of the adventure (and supports local businesses).
Diversify your funds. Relying on just one credit card or one wad of cash is risky. Have at least two different cards (Visa/Mastercard/Amex) from different banks if possible, know their foreign transaction fees, carry a bit of local currency acquired from a reputable source (not the airport exchange booth with terrible rates), and *always* inform your bank of your travel dates to avoid frozen cards.
Guard your documents like precious jewels. Passport, visas, IDs, insurance details – keep them secure, ideally not all in one place. Make digital copies and store them accessibly online (but secure!). Know the location of your country’s embassy or consulate.
Stay aware. This means more than just checking the weather. Be mindful of your surroundings, understand basic safety advisories for the area, and know the local emergency numbers. A little vigilance goes a long way in preventing mishaps.
Immerse yourself. The best travel happens when you step out of your comfort zone and connect with the place and its people. Learn a few basic phrases, try the street food the locals are lining up for, understand and respect cultural norms and dress codes, and be open to unexpected conversations.
Prioritize health and safety. Get comprehensive travel insurance – seriously, don’t skip this. Know if you need any specific vaccinations or malaria precautions for your destination. Carry a small personal first-aid kit.
Embrace flexibility and patience. Travel is unpredictable. Flights get delayed, trains run late, things close unexpectedly. Don’t let minor setbacks ruin your experience. A calm, adaptable attitude turns potential frustrations into funny stories later.
Consider local connectivity. Buying a local SIM card or using an e-SIM service is often far cheaper and more reliable than relying on expensive roaming or spotty public Wi-Fi. But also, remember to look up from your screen and actually *see* the world around you.
Are digital cameras better than iPhone?
As a travel journalist who’s lugged gear through bustling souks and up mountain trails, the “digital camera vs. iPhone” debate is less about which is inherently “better” and more about which tool suits the moment and the story you’re trying to tell.
Here’s the practical breakdown from the road:
Why a Digital Camera (DSLR/Mirrorless) Still Has Its Place:
- Uncompromised Image Quality: When you need that breathtaking shot of a distant ruin at sunrise or the intricate details of a local artisan’s work for a print feature, the larger sensors and superior optics of dedicated cameras deliver. They handle complex lighting much better, crucial when you’re shooting in varied conditions.
- Creative Command: Want to control the depth of field to make a street portrait pop against a blurred background? Need precise shutter speed to capture motion or freeze it? Manual controls give you the artistic freedom an iPhone, despite its computational power, can’t fully match.
- Lens Versatility: This is huge for travel. A wide-angle lens for sweeping landscapes, a telephoto for wildlife or capturing faces across a plaza without intrusion, a macro for intricate market details – interchangeable lenses mean you’re equipped for almost any photographic opportunity a journey throws at you.
- Ergonomics in the Field: After hours of shooting, the grip and balance of a dedicated camera body are simply more comfortable and stable, especially when dealing with heavier lenses or trying to nail a sharp shot in tricky positions.
Where the iPhone Excels on the Go:
- Always Ready, Always Portable: The best camera is the one you have with you. For those fleeting moments – a unique street performance, an unexpected vista from a train window, a quick shot of a vibrant meal – the iPhone is unparalleled. It’s light, pocketable, and instantly accessible.
- Computational Magic: iPhones use powerful software to enhance images right at the point of capture. Portrait mode, impressive low-light performance (often without needing a tripod), and Smart HDR can produce striking results in everyday situations, perfect for quick snaps.
- Instant Sharing: For sharing moments with readers, editors, or just friends and family back home, the iPhone’s integrated connectivity is invaluable. Snap, edit (often minimally), and share within minutes – essential for social media updates or live blogs.
- Part of Your Existing Kit: While specialized lenses add cost to a digital camera setup, your iPhone is already the hub for communication, navigation, and often, entertainment. Its camera functionality is an included bonus, making it a cost-effective tool for general photography.
In essence, for high-stakes, quality-critical shots where control and specific optics are paramount, a digital camera remains the professional choice. But for documenting the constant flow of a journey, capturing spontaneous moments, and immediate sharing, the iPhone is an indispensable, versatile companion.
How to take a photo of yourself from a distance?
To take a photo of yourself from a distance, stability is key. Place your camera or phone securely on a tripod, mini-tripod, or any stable surface you can find – a rock, a wall, a bench – pointing towards where you want to be.
The classic method is using the camera’s built-in timer. Set it for 10 seconds; this gives you plenty of time to walk into position and look relaxed. For shots involving landscapes or distant backgrounds that you want sharp along with yourself, particularly on cameras with aperture control, use a narrower aperture like f/8 or even f/11-f/16 to increase the depth of field. If you only have a phone, modern ones often have good depth simulation anyway.
Getting the focus right when you’re not behind the lens is crucial. If you’re alone, place a stand-in object (like your bag) where you plan to be and focus on that before activating the timer. Alternatively, pre-focus on a point near your intended position, or use a camera/phone feature that locks focus (often by pressing and holding on a spot on the screen).
A much more flexible option, especially if you plan many such shots or are travelling solo, is a small Bluetooth remote shutter release. It lets you compose, get into place, and take the picture whenever you’re ready, and even take multiple shots easily without returning to the camera.
Always take a test shot to check your framing, exposure, and focus before getting the final picture. Make sure you’re actually in the frame and the horizon is straight!

