
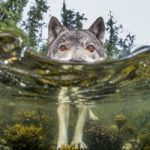
The so-called “3 1 rule” in photography, more accurately known as the rule of thirds, is a fundamental compositional guideline. It suggests placing your subject off-center, roughly one-third of the way into the frame, either horizontally or vertically (or even both!). This avoids the often static and uninteresting feel of centering your subject, creating a more dynamic and visually engaging image. I’ve seen this applied masterfully in countless landscapes across the globe – a lone tree silhouetted against a sunset on the Mongolian steppe, a bustling market scene in Marrakech captured with the main action a third of the way across the frame, leaving space for the vibrant colours to breathe. This deliberate imbalance creates visual tension and leads the viewer’s eye naturally through the scene.
Why does it work? It taps into our natural tendency to scan images rather than just passively observe them. By not placing the subject dead center, you’re inherently guiding the viewer’s gaze around the image, encouraging a deeper engagement with the composition. This is particularly useful in travel photography, where you want to convey both a sense of place and the subject within that place.
Beyond the Basics:
- Consider the negative space: The empty two-thirds of the frame are just as important as the subject. This “negative space” provides breathing room, allowing the viewer’s eye to rest and appreciate the overall context. Think about a portrait shot with plenty of empty space around the person – it can emphasize their solitude or convey a feeling of vastness.
- Intersection points: The rule of thirds often involves placing the subject at one of the four points where the imaginary lines intersect. These points are considered naturally visually appealing, adding further dynamism to your composition.
- Breaking the rule: As with any guideline, it’s okay to break the rule of thirds! Centering your subject can be powerful if used deliberately, especially to highlight symmetry or create a sense of calm and stability. This works exceptionally well with architectural photography, for example.
Mastering the rule of thirds is a journey, not a destination. The more you experiment and understand its underlying principles, the more effectively you can use it – or break it – to create stunning and memorable photographs during your travels.
What are the 4 essentials to a landscape photo?
Four elements are crucial for stunning landscape photography. Mastering them elevates your shots from snapshots to art.
Light: This is paramount. Golden hour (sunrise and sunset) offers warm, soft light, ideal for landscapes. Blue hour (twilight) provides a cool, moody atmosphere. Harsh midday sun can create strong shadows; learn to use them creatively, or shoot in the shade for softer illumination. Consider the direction of the light – backlighting can create silhouettes, sidelighting reveals texture, and frontlighting provides even illumination. Always check the weather forecast; clouds dramatically affect light quality.
Subject: Don’t just capture a scene; tell a story. A compelling subject anchors your image. This could be a majestic mountain, a sprawling field, a dramatic coastline, or even a solitary tree. Pre-visualising your shot – considering what you want to emphasize – is key. Think about leading lines (roads, rivers) that draw the viewer’s eye to your subject.
Background: A clean background prevents distractions. Clutter detracts from your subject. Look for a simple, uncluttered backdrop that complements your main focus. This might involve careful positioning or even waiting for people or cars to move out of the frame. Depth of field, using a wider aperture (smaller f-number), can help blur the background and isolate your subject.
Composition: This is where you arrange the elements within your frame. Consider the rule of thirds, placing your main subject off-center for a more visually appealing composition. Experiment with different perspectives – get low to the ground, climb a hill, or find a unique vantage point. Using leading lines, framing with natural elements (like trees or rocks), and understanding negative space can significantly enhance your photos. Learn about different compositional techniques – like the golden ratio – to add depth and interest to your images.
Bonus Tip: Pack a polarizing filter to reduce glare and enhance colors, particularly in skies and water.
What is the golden triangle in photography?
Think of the Golden Triangle in food photography – or any photography, really – as a trusty compass for visually navigating your shot, like finding the perfect campsite. It’s not about strict adherence to geometrical perfection; it’s a guideline to lead your eye.
Instead of a rigid triangle, visualize it more flexibly: A dynamic diagonal line stretching from one corner to its opposite creates a powerful visual path. Then, imagine two shorter lines branching off from the remaining corners, intersecting the diagonal at approximately right angles (think of a tent pitched on a slope!). These lines create natural visual points of interest, leading viewers’ eyes directly to your main subject – that magnificent mountain vista (or delicious-looking meal).
Here’s why it works for a hiker’s eye:
- Natural Flow: The diagonal avoids the stiffness of a centered subject, providing a more engaging, dynamic composition – like a winding mountain trail.
- Emphasis: The intersections of the lines naturally draw attention to your subject, similar to how a prominent landmark guides your hike.
- Visual Balance: Despite the diagonal dominance, the secondary lines prevent the image from feeling lopsided – like balancing your pack weight perfectly.
Beyond Food: This isn’t just for close-ups of gourmet meals. I use the Golden Triangle composition for landscape photography all the time. Picture a stunning mountain peak positioned at one of the triangle’s intersections. The lines will naturally guide the viewer’s eye through the foreground elements (perhaps a flowing river) to that peak, making for a more compelling and naturally engaging photograph.
What is golden hour in landscape photography?
As a seasoned globetrotter, I can tell you the golden hour, or magic hour – that period an hour after sunrise and before sunset – is the holy grail for landscape photography. It’s not just a pretty name; it’s a game-changer.
Why is it so special? The low sun angle during this time casts long shadows, creating depth and drama you simply can’t achieve at midday. The light itself is softer, warmer, and more diffused, minimizing harsh contrasts and highlighting textures beautifully. Think of the golden hues painting the landscape – breathtaking!
Here’s what makes it truly magical for capturing incredible shots:
- Warm, rich tones: The light bathes everything in a gorgeous, golden glow.
- Enhanced colors: Landscapes appear more vibrant and saturated.
- Dramatic shadows: Long shadows add depth and visual interest to your compositions.
- Soft light: Minimizes harsh shadows and allows for even exposure.
Pro-tip: Plan your shoots meticulously. Use a weather app to check the exact times of sunrise and sunset for your location. The light changes rapidly, so be ready!
Beyond the hour: While the golden hour is the star, the “blue hour” – the twilight period just before sunrise and after sunset – also offers unique photographic opportunities with its cool, serene tones. Experiment with both to fully capture the mood of your location.
- Scout your location beforehand: Knowing the terrain and potential compositions helps you maximize your time.
- Bring a tripod: Lower light levels often require longer exposures.
- Use a graduated neutral density filter (GND): This will help balance the exposure between the bright sky and the darker foreground.
What is the Golden Ratio in landscape photography?
The Golden Ratio, roughly 1:1.6, is a compositional guideline in landscape photography. Forget the rigid grid; imagine your frame divided into a series of squares based on the Fibonacci sequence. Think of it like strategically placing your campsite along a meandering river – each bend, a new square.
Tracing a spiral through these squares creates a Fibonacci spiral, similar to a nautilus shell. This spiral naturally guides the eye through the scene, emphasizing key elements. Imagine placing your tent where the spiral intersects the most visually appealing part of your campsite – maybe a breathtaking mountain view or a tranquil waterfall. This improves visual flow and balance, making for a more captivating image, just like an amazing hike unfolds beautifully.
Practical application: When composing a shot of a mountain range, try placing the peak at a Golden Ratio point. Or, when photographing a winding trail, use the spiral to guide your viewer’s eyes along its length. It’s a tool, not a rule; experiment to find what works best with your unique perspective. Don’t be afraid to break the rule; sometimes, the most memorable moments happen off the beaten path.
Note: While the precise mathematical ratio is 1:1.618…, 1:1.6 is a close enough approximation for practical purposes in the field.
What is the best landscape image ratio?
The 3:2 aspect ratio reigns supreme in landscape photography; it’s the familiar standard inherited from 35mm film and embraced by most DSLRs and mirrorless cameras. This classic format offers a fantastic balance – enough width to capture expansive vistas, yet retaining a pleasing vertical dimension for compositional depth. I’ve personally found it ideal for showcasing the grandeur of the Himalayas or the intricate details of a Tuscan vineyard.
However, don’t be afraid to experiment! While 3:2 is a reliable workhorse, the “best” ratio is ultimately subjective and dependent on your vision. A wider 16:9 ratio, favoured by many cinematic productions, excels at immersive panoramic shots, perfectly capturing the sweeping landscapes of the Serengeti. On the other hand, a more squared-off ratio, like 1:1, forces a more deliberate and minimalist approach, ideal for emphasizing a particular element within the scene – perhaps a solitary tree against a vast desert sky.
Consider your subject: Dramatic mountains might benefit from a more vertical orientation, while a sprawling coastline might demand a wider perspective. Don’t be constrained by a single ratio; embrace the flexibility to choose the format that best complements your creative intentions. The power lies not in adhering to a strict standard, but in understanding how each ratio can be employed to enhance your storytelling.
Ultimately, the most important aspect isn’t the ratio itself, but the composition and the story you’re trying to convey. Mastering composition is far more crucial than adhering rigidly to a single aspect ratio. Experiment and find what works best for *your* unique photographic journey.
What ISO should I use for landscape photography?
The ideal ISO for landscape photography is the lowest your camera offers, typically ISO 100 or 200. This minimizes digital noise, resulting in cleaner, higher-quality images. Think of it like this: lower ISO is to landscape photography what a sharp lens is to a portrait – essential for crisp detail.
However, the “lowest is best” rule bends in certain situations:
- Low Light: Shooting at dawn, dusk, or night necessitates a higher ISO. You’ll need faster shutter speeds to avoid blurry images, and that often means compromising on ISO.
- Motion Blur Effects (Waterfalls, Stars): For capturing the silky smoothness of a waterfall or the star trails in a night sky, you’ll often require a longer exposure. This pushes you towards higher ISO settings, balancing the need for a longer shutter speed against the increase in noise.
Experienced landscape photographers often prioritize image sharpness and detail over eliminating all noise. Minor noise is often easily manageable in post-processing, especially with today’s advanced software. The impact of a slightly higher ISO is negligible compared to the benefit of capturing the desired shot, especially if using a tripod in low-light situations.
Tripod Use: A sturdy tripod is your best friend in low-light situations. It allows you to use a much lower ISO and a longer shutter speed, maintaining image quality without resorting to high ISO noise.
Camera Considerations: Modern cameras boast significantly improved high-ISO performance. A recent model might produce acceptable images at ISO 1600 where an older camera would be severely grainy. Test your camera’s high ISO capabilities; you may be surprised.
Experimentation is Key: The “best” ISO is always context-dependent. Shoot in various light conditions and compare the results. Learn your camera’s strengths and limitations. Develop your own “feel” for the balance between image quality and ISO noise.
- Daylight: Stick with ISO 100-200.
- Twilight/Dawn/Dusk: Experiment between ISO 200-800, using a tripod whenever possible.
- Night Photography (Stars, Milky Way): ISOs of 1600-6400 or even higher might be necessary; a tripod is indispensable.
What are the 7 steps to landscape design?
Designing a landscape is like planning a great expedition. Here’s a seasoned traveler’s 7-step itinerary:
- Plan Your Expedition: Define your “destination”—what feeling or function do you want your landscape to achieve? Consider sun exposure, soil type (essential!), water availability, and microclimates (those sunny/shady pockets). Sketch a rough map; even a napkin doodle helps. Think about long-term maintenance – what can you realistically manage?
- Clear the Terrain: Remove existing vegetation and debris. This is your base camp establishment. Consider composting suitable material; it’s like bringing home souvenirs – resourceful and enriching for future plantings!
- Install the Infrastructure: Lay down the “roads” and “buildings” – paths, patios, retaining walls, etc. This is crucial groundwork, affecting drainage and future plant placement. Remember accessibility for maintenance and enjoyment!
- Choose Your Flora: Select plants suited to your climate, soil, and sun conditions. Research native species; they are more resilient and support local ecosystems – think of them as reliable travel companions adapted to the terrain. Consider plant heights and spread to avoid future conflicts.
- Strategic Planting: Think layers – taller plants at the back, shorter in front. Group plants with similar needs together for easier care. Remember visual balance and interest – a well-designed landscape is as pleasing to the eye as a breathtaking vista.
- Soil Improvement: Healthy soil is the key to thriving plants. Amend the soil with compost and other organic matter. Think of it as fertilizing the land before setting up your tent – crucial for successful settlement.
- Ongoing Maintenance: Landscaping isn’t a one-time event but a continuous journey. Regular watering, weeding, pruning, and fertilizing are essential for long-term beauty and health. It’s like regular gear checks on your trek – ensures everything runs smoothly.
How to take stunning landscape photos?
Stunning landscape photography hinges on light. Golden hour (sunrise and sunset) offers the most captivating light, with soft, warm tones that add depth and drama. Overcast days can also be surprisingly good, providing even illumination and minimizing harsh shadows.
Focal length is key. A wide-angle lens captures expansive views, ideal for showcasing vast landscapes. However, a longer telephoto lens allows you to compress perspective, making distant elements appear closer and creating a more dramatic composition. Experiment with both!
Composition is crucial. Consider these elements:
- Leading lines: Rivers, roads, or fences draw the viewer’s eye into the scene.
- Rule of thirds: Place key elements off-center for a more dynamic image.
- Framing: Use natural elements like trees or arches to frame your subject.
Clouds add texture and visual interest to the sky. Even a few strategically placed clouds can significantly improve a landscape photo.
Light and shadow play a vital role in creating three-dimensionality. The interplay of light and shadow on mountains, for instance, helps convey their scale and form. Look for backlighting (light behind the subject) to highlight texture and create silhouettes.
Practical Tips:
- Use a tripod for sharp images, especially in low light conditions.
- Shoot in RAW format to retain maximum image detail for post-processing.
- Consider using a polarizing filter to reduce glare and enhance colors.
- Check the weather forecast before you go! Dramatic skies often accompany weather changes.
- Plan your shots ahead of time – scouting locations during the day helps you maximize your time during golden hour.
What is the 321 rule in photography?
The 3-2-1 Rule? Essential for any globetrotting photographer. It’s not about perfect composition, but perfect preservation of your memories. Think of it as my own personal Sherpa for digital assets: three copies of your images – that’s one on your primary camera card, a second on a backup card (maybe even a different brand!), and a third elsewhere. Then, two different media types – so SD cards, and an external hard drive, or even cloud storage. And finally, one copy kept off-site – think a secure cloud service or a hard drive stored at a friend’s place, far from any potential disaster like a hotel fire or a sudden, unexpected monsoon. This strategy protects your work from equipment failure, theft, and natural disasters – ensuring that your stunning landscapes or vibrant street photography survive even the most adventurous of trips.
Consider the added security of using multiple cloud storage providers for the off-site backup – think of it as diversifying your portfolio, but for your priceless memories. And remember to regularly check the integrity of your backups. You wouldn’t rely on a single compass in the Himalayas, would you?
What is the best format for landscape photography?
For landscape photography, the 3:2 aspect ratio reigns supreme. It’s the standard for most DSLRs and mirrorless cameras, offering a great balance between horizontal and vertical composition. This is largely due to its heritage – it’s the classic 35mm film format, and many photographers find its proportions inherently pleasing to the eye, particularly for expansive landscapes. However, don’t limit yourself! While 3:2 is versatile, consider other options depending on your artistic vision. A wider aspect ratio like 16:9 (often found in video cameras and some DSLRs) can beautifully capture panoramic scenes, really emphasizing the width of a vista. Conversely, a more square or even a taller, more vertical aspect ratio can allow for a completely different feel, drawing the eye upwards to emphasize height and detail, perfect for mountains or waterfalls. Ultimately, the “best” format is the one that best serves your creative intent and the specific scene you’re shooting. Experimentation is key. The best camera is the one you have with you, after all, so use its capabilities to your advantage.
What is the f 16 rule in photography?
The f/16 rule is a sunny-day guideline for exposure, suggesting an f-stop of f/16 and a shutter speed reciprocal to your ISO. For example, with ISO 400 film, you’d use 1/400th of a second (or thereabouts; 1/250th or 1/500th are commonly used approximations). This ensures a generally well-exposed image. However, it’s crucial to remember this is a starting point, not a rigid rule. Altitude significantly impacts light levels; the higher you go, the stronger the sun’s intensity, potentially necessitating a faster shutter speed to compensate for overexposure. Similarly, clouds dramatically reduce light, often demanding a slower shutter speed or wider aperture. Always check your histogram and use exposure compensation to fine-tune your results. Consider using a light meter for greater accuracy, especially in challenging lighting conditions like heavily shaded areas or bright reflective surfaces. Finally, remember that modern digital cameras offer far more sophisticated metering systems than film cameras, so the f/16 rule serves mainly as a handy baseline for beginners or when quickly setting up a shot under ideal sunlight.
What mode should I use for landscape photography?
For breathtaking landscapes, mastering your camera’s settings is key. I’ve chased sunrises across the Serengeti and sunsets over the Himalayas – trust me, the right mode makes all the difference. Most landscape photographers swear by two:
- Aperture Priority (Av or A): This lets you control the depth of field – crucial for landscapes. A smaller aperture (higher f-number like f/8 or f/16) keeps everything from foreground to background sharp. Your camera automatically selects the shutter speed, ensuring a properly exposed image. Perfect for those sweeping vistas where you want maximum detail.
- Manual Mode (M): This offers complete control. From the bustling markets of Marrakech to the serene beaches of Bali, I’ve used manual mode to fine-tune every aspect – aperture for sharpness, shutter speed for motion blur (or freezing action, like a waterfall), and ISO for image noise. It requires more understanding, but delivers unparalleled creative freedom. Mastering this mode unlocks truly unique compositions.
Consider these factors when choosing:
- Lighting Conditions: Bright sunlight often allows for smaller apertures and faster shutter speeds. Dim light might demand a wider aperture and slower shutter speed, potentially needing a tripod to avoid blurry images.
- Depth of Field Requirements: Do you want everything in focus, from the wildflowers in the foreground to the distant mountains? A smaller aperture is your friend. If you want to isolate a particular element, a larger aperture (lower f-number) will create a shallow depth of field.
- Motion: Moving water? A slower shutter speed creates that dreamy, silky effect. Fast-moving clouds? A faster shutter speed will freeze them in place.
Experiment with both modes. Find what best suits your style and the scene before you. Remember, the best mode is the one that helps you capture the emotion and beauty of the landscape as you experienced it.
What is the best F stop for landscape photography?
For landscape photography, the optimal f-stop generally falls between f/8 and f/16. This range balances depth of field – ensuring both foreground and background are sharp – with image sharpness. Going narrower, to f/22 or f/32, increases depth of field but risks diffraction, softening the image. Each lens has a “sweet spot,” usually a couple of stops down from its widest aperture, where sharpness is maximized. This varies by lens.
f/8-f/11 offers a great compromise between depth of field and sharpness, making it popular among landscape photographers. f/16 excels at keeping a wide range of the scene in focus. However, very narrow apertures can lead to diffraction, reducing sharpness. Your choice ultimately depends on the lens, scene, and your artistic vision. A shallow depth of field might necessitate a wider aperture like f/2.8 or f/4 to isolate a subject. Conversely, extensive depth of field might require focus stacking – combining multiple shots with varying focus points in post-processing. This is especially helpful for scenes with significant depth.
Remember that your lens’s performance influences aperture selection. A lens with a maximum aperture of f/2.8 might be sharpest around f/5.6 or f/8. Experimentation is key! Consider the lighting conditions too. Brighter light allows for narrower apertures while maintaining sufficient shutter speed to avoid motion blur, a common issue in landscape photography especially in low light. Always shoot in RAW format to maximize post-processing flexibility.
Pro Tip: Consider the hyperfocal distance. This is the distance at which everything from half that distance to infinity is in acceptable focus. Knowing your hyperfocal distance allows you to optimize your depth of field using only one focus point, useful for fast shooting in changing conditions. Many online calculators can help you determine this based on your lens and aperture.
What is the rule of 3 in landscape photography?
The Rule of Thirds, a cornerstone of compelling landscape photography, suggests positioning key compositional elements – a majestic mountain, a vibrant sunset, a lone tree – along imaginary lines that divide your frame into thirds both horizontally and vertically. Instead of centering your subject, placing it at or near these intersection points creates a more dynamic and visually engaging image. This isn’t a rigid law, but rather a guideline honed over years of photographic practice. I’ve found it particularly useful in vast landscapes, preventing the scene from feeling flat or lifeless. The intersecting points act as natural focal points, drawing the viewer’s eye through the image in a pleasing, almost intuitive way. Consider the interplay of light and shadow, leading lines, and the overall balance of your composition in conjunction with the Rule of Thirds for even greater impact. After countless sunrise shoots across the globe, I can attest to its effectiveness in capturing the breathtaking beauty of nature’s grand canvas. Many of my most successful landscape shots directly benefited from consciously utilizing this simple but powerful compositional tool.
What the photographer looks through to take a picture?
The viewfinder is the window to a photographer’s world, the portal through which they frame their masterpieces. From bustling Parisian streets to serene Himalayan peaks, it’s the constant companion across countless landscapes and cultures. Many photographers, especially those using single-lens reflex (SLR) cameras, experience a direct, optical connection with their subject through the viewfinder – a truly immersive experience. This direct view allows for precise composition and a deep understanding of depth of field, crucial for capturing everything from the vibrant colors of a Moroccan souk to the delicate details of a Japanese garden. Beyond simply seeing the subject, the viewfinder becomes a tool for anticipation, for pre-visualizing the final image. In the chaos of a crowded Indian market, or the quiet solitude of an Icelandic fjord, the viewfinder isolates the photographer’s focus, helping them to hone in on the decisive moment. Different viewfinder types, from optical to electronic, offer various levels of precision and real-time data feedback, impacting how photographers interact with the scene and ultimately, their style. Consider the impact of live view versus the traditional optical viewfinder – each offering a distinct approach to the creative process. The viewfinder: much more than just a window; it’s a lens into the photographer’s unique vision and their relationship with the world.
How do professional photographers take breathtaking landscape photos?
Pro landscape photographers often use polarizing filters – these aren’t just for fancy cameras; even my trusty point-and-shoot benefits! They dramatically boost color saturation and contrast, especially in scenes with water – think those stunning mountain lake reflections. The filter cuts down glare from the sun bouncing off surfaces, revealing richer blues in the sky and more vibrant greens in the foliage. I’ve found it particularly helpful when shooting at midday, when the light is harsh. Remember, the effect of the polarizer changes depending on the angle of the sun relative to your camera, so experiment with rotation to find the optimal effect. Getting the perfect shot often means playing with the filter and finding the sweet spot – it’s part of the adventure!
Beyond filters, they master composition: leading lines (like a winding river or a mountain range), the rule of thirds (placing key elements off-center), and using foreground elements to add depth. And don’t underestimate the impact of light! The “golden hour” (sunrise and sunset) offers magical soft light that dramatically enhances landscape photos. So, pack light, hike to that amazing vista point, and experiment – the most breathtaking photos often require a bit of patience and exploration.
What is the 80 20 rule in photography?
The 80/20 rule, or Pareto’s Principle, isn’t just a business adage; it’s a global phenomenon I’ve witnessed firsthand across countless photography shoots in diverse landscapes from the bustling markets of Marrakech to the serene rice paddies of Bali. In photography, this means 80% of your impactful images likely stem from 20% of your effort, your locations, or even your gear.
Identifying that crucial 20% is key. It might be mastering a specific lighting technique that elevates your portraits, a particular location that consistently provides stunning backdrops, or even a small set of lenses that capture the majority of your vision. Think critically: what are your most successful shots? What elements repeatedly contribute to their impact?
This principle transcends mere business strategy; it’s about strategic efficiency. Don’t spread yourself thin chasing every photographic opportunity. Instead, focus intently on honing your skills and refining your approach within that potent 20%. That laser focus will yield exponentially better results, allowing you to maximize your creative output and business success, regardless of location.
This isn’t about laziness, but about intelligent prioritization. It’s about understanding your strengths and leveraging them to create exceptional work. I’ve seen countless photographers waste time and resources on less-impactful pursuits. By focusing on the elements that truly drive results, you free yourself to concentrate on what truly matters: creating compelling imagery.

